Bisq is decentralized, private, and secure—but it’s surprisingly approachable—and this guide will help you get up and running quickly.
In this guide, we’ll assume you want to buy bitcoin in exchange for a national currency, since that’s how most people get started with Bisq.
Specifically, we’ll show you how to buy bitcoin with US dollars, using a popular payment method called Zelle. Keep in mind, though, that Bisq offers support for trading all national currencies and dozens of different cryptocurrencies and tokens—the only constraint is that one side of each Bisq trade must always be bitcoin.
Download & install
To run Bisq, download and install it from the Bisq downloads page.
|
Why do I need to download software? Why can’t I just trade on your website?
Unlike most exchanges, Bisq doesn’t run a centralized server for making and taking offers, so trading on a website isn’t possible. Instead, Bisq manages offers to trade using a peer-to-peer network—a global network of people who are also running Bisq on their own computers. This is good news for users, because centralized services are easy to monitor, block and shut down, while peer-to-peer networks like BitTorrent, Bitcoin and Bisq are difficult to surveil, censor and hack. This means that if you want to use the Bisq Network, you’ve got to download and run the software too! |
Once the installer is finished, go ahead and open Bisq. It’ll take a few moments to open as it connects to the Tor network and syncs with Bisq’s peer-to-peer trading network.
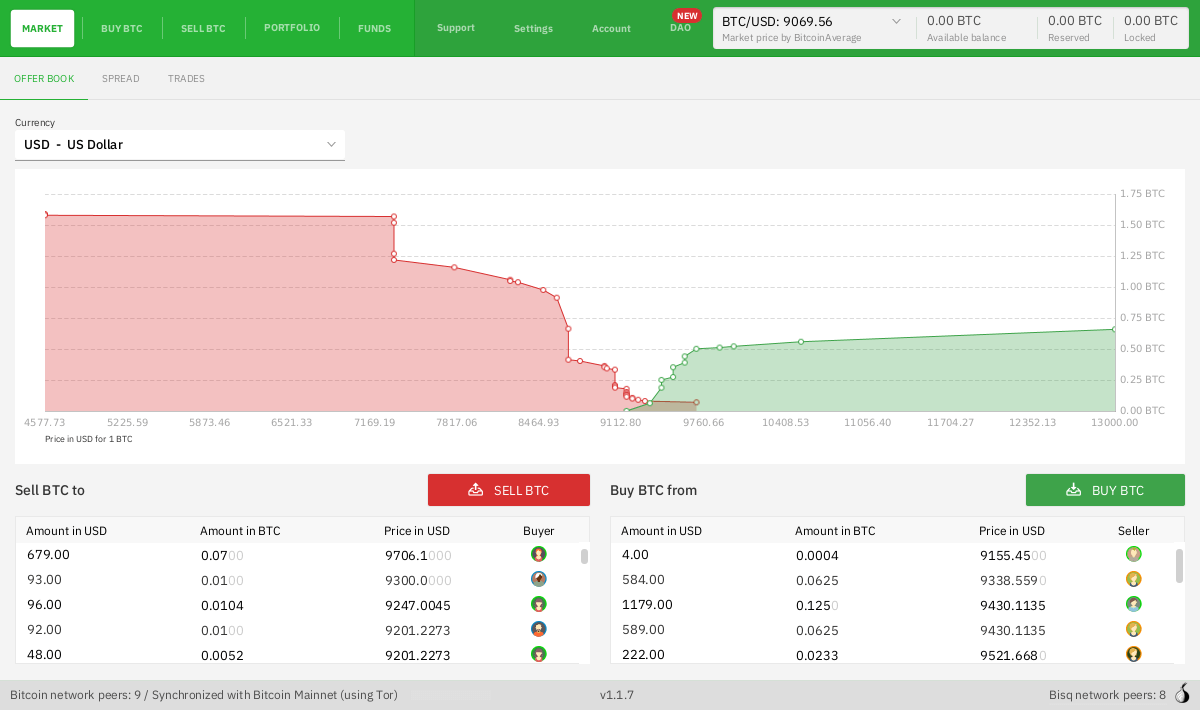
When that’s done, the first screen you see should look something like this:
Configure a national currency account
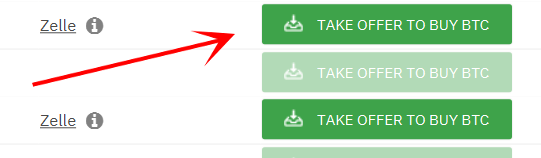
Since we’re looking to buy bitcoin, let’s take a look at the Buy BTC screen. You should see a list of offers, but you’ll notice all the green Take offer buttons are disabled:
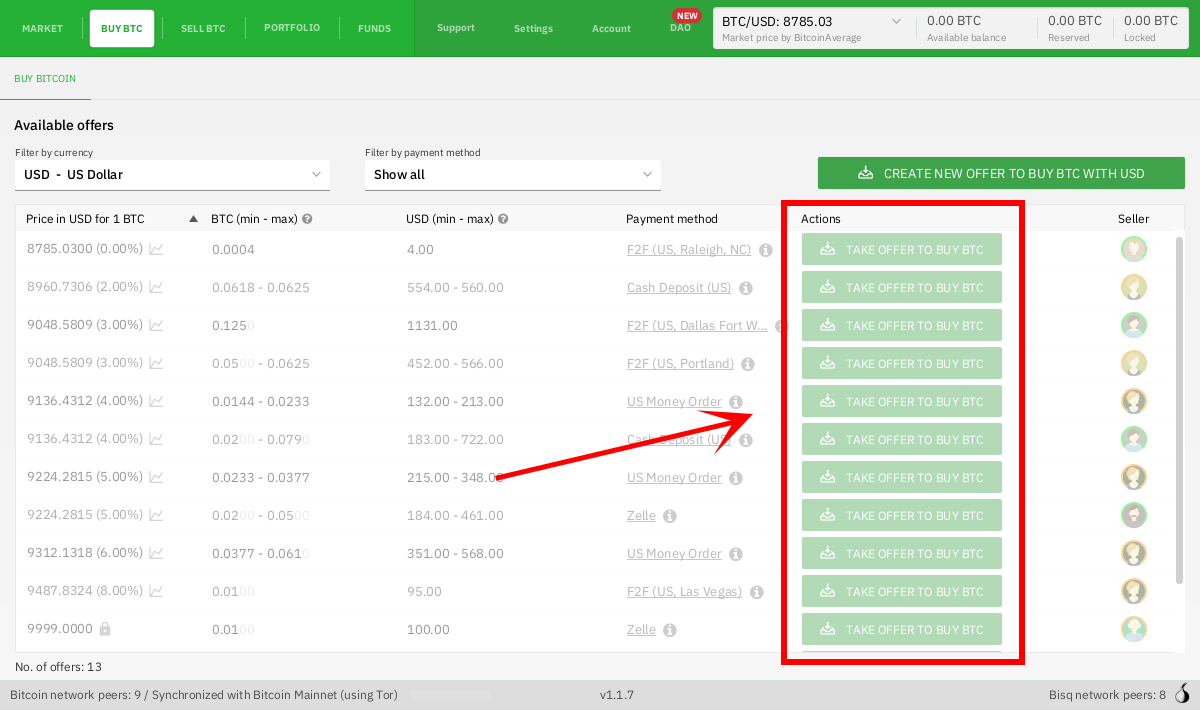
That’s because we haven’t yet configured a way to pay for the bitcoin we want to buy. So let’s set up a payment method. Bisq works with many different payment methods, so you can choose those you already have access to and are most comfortable using. Keep in mind that payment methods determine:
-
which offers you can take right now (e.g., in the image above, Zelle has a couple of existing offers, so if we set up a Zelle account in Bisq, we could immediately take any of those Zelle offers).
-
how quickly a trade can be completed (e.g., a bank transfer will go through quicker than a money order sent by mail; see details here)
|
What if there are no existing offers for the payment method I want to use?
If you don’t see any offers for the payment method you want to use, consider creating your own offer with the You can also check back later, as offers come and go as Bisq users around the world go online and offline throughout the day. |
|
Where is my payment account data stored?
On your computer only (i.e., the computer on which Bisq is installed). Only your trading partner (and your mediator or arbitrator, if there’s a dispute) will ever see your payment details. |
In this tutorial, we’ll configure a Zelle account. You can adapt the instructions that follow to the payment method you choose.
Go to the Account screen and click Add new account. Select Zelle from the dropdown and enter your details.
You’ll need to enter your full name as registered with your Zelle account as well as the email address or mobile phone number linked to your Zelle account.
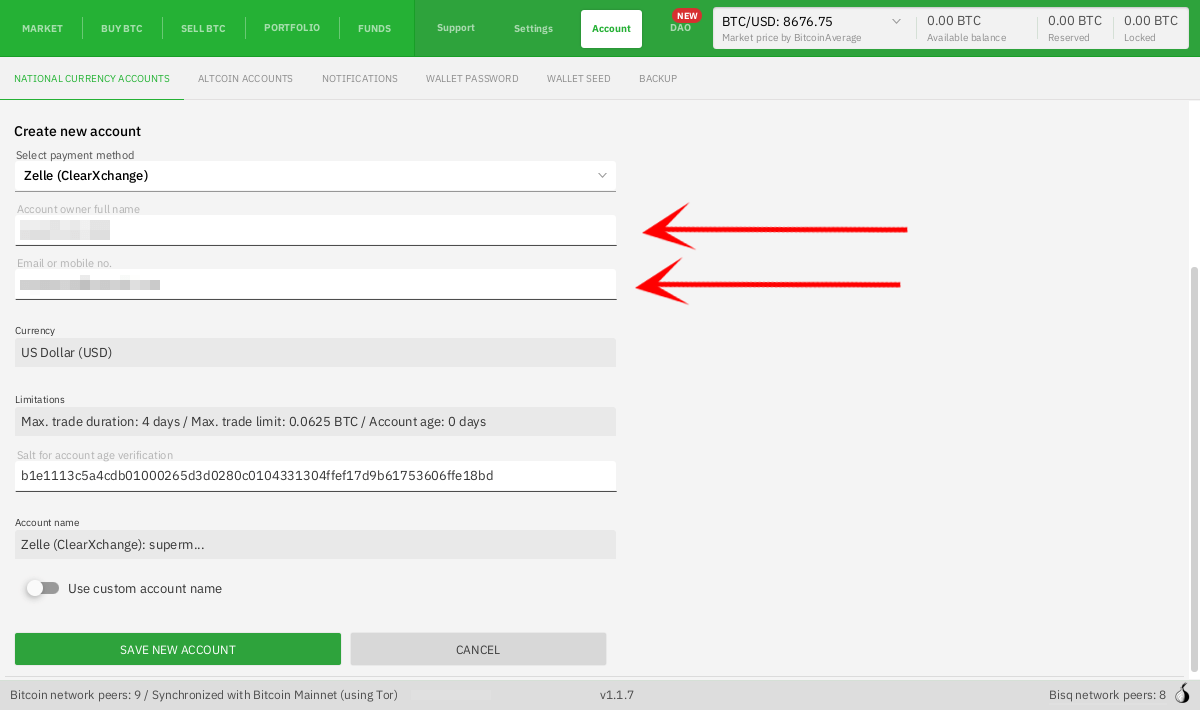
You don’t need to edit the Salt field. You can keep the Account name unchanged or change it however you like: this is an internal label that only you will ever see, so there’s no right or wrong value for it.
| It’s crucial the information you enter here is correct. Your trading partner can only acknowledge your payment if it’s from the account detailed here. Once you’ve created an account, you cannot edit its information (if you need to make a change, you’ll have to delete and add the account again). |
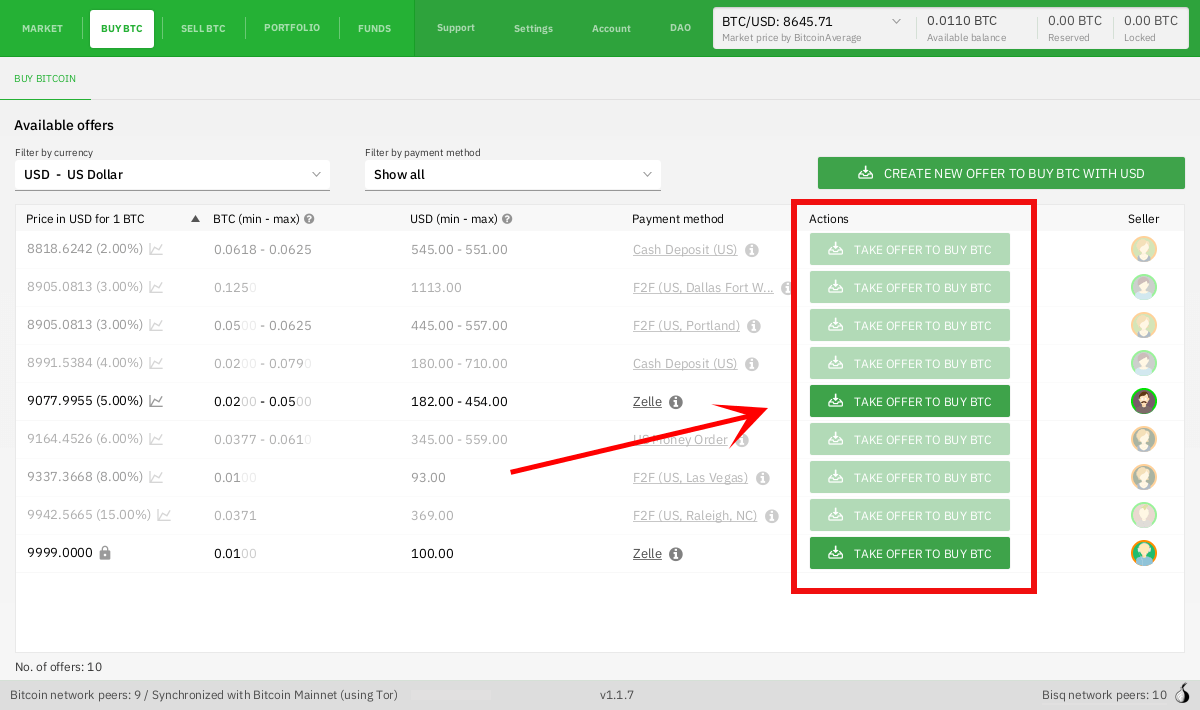
Once you’re done, hit the Save new account button and go back to the Buy BTC screen. Offers requiring the payment method you just configured should now be enabled:
Fund your Bisq wallet
There’s just one more thing to do before we can trade with Bisq: we need to send enough bitcoin to our Bisq wallet to cover a security deposit as well as trading and mining fees.
Security deposits help prevent fraud, so Bisq requires both buyers and sellers to post one (in bitcoin) for every trade. On the buyer’s side, this is usually 15% of the trade amount.
| Sellers can specify their preferred deposit percentage when creating an offer to sell bitcoin. The default is 15%, but it’s possible you’ll come across offers that require bigger (or smaller) security deposits. A minimum security deposit of .006 BTC applies to both buyers and sellers. |
As of this writing, you would need about 0.0061 BTC to take an offer to buy 0.01 BTC that requires a minimum security deposit. But please note that mining fees can fluctuate, some sellers may require bigger security deposits, and you’ll need more for bigger trades, so it may be better to acquire more than the bare minimum so you have more flexibility.
If you don’t already own the bitcoin you need, you’ll need to obtain it. How? You’ve got options. Friends and family are often the best option—simply buy a small amount of bitcoin directly from someone you trust. Otherwise, you can try a local bitcoin ATM (many don’t require ID for small transactions), bitcoin meetups/events, or vouchers.
|
How about getting bitcoin through a centralized exchange like Coinbase?
Most centralized platforms and exchanges (like Coinbase, Binance, Kraken, etc) track your personal information, putting you at risk by tying your identity to the bitcoin you buy and sell there. And because Bitcoin transactions are public and easily traceable, potentially all of your future transactions involving those bitcoin could be traced back to you. Bisq is built from the ground up to avoid this privacy fiasco, so we strongly recommend avoiding centralized exchanges and to get your first bitcoin through one of the other channels mentioned above. |
Once you’ve gotten enough bitcoin for your security deposit and fees, you can move it into Bisq’s built-in wallet. This isn’t strictly required, but it’ll make trading more convenient since the security deposit & fees you need to accept an offer will be readily available when making or taking an offer.
|
Make sure to password-protect your Bisq client and to write down the seed words for your Bisq wallet. Seed words allow you to recover the funds in your wallet in case of disaster. You’ll find them in the Don’t worry, we’ll remind you about this again at the end of this tutorial so you don’t forget. |
To send bitcoin to your Bisq wallet, go to the Funds screen and click the Receive tab. Send your bitcoin to one of the addresses listed there.
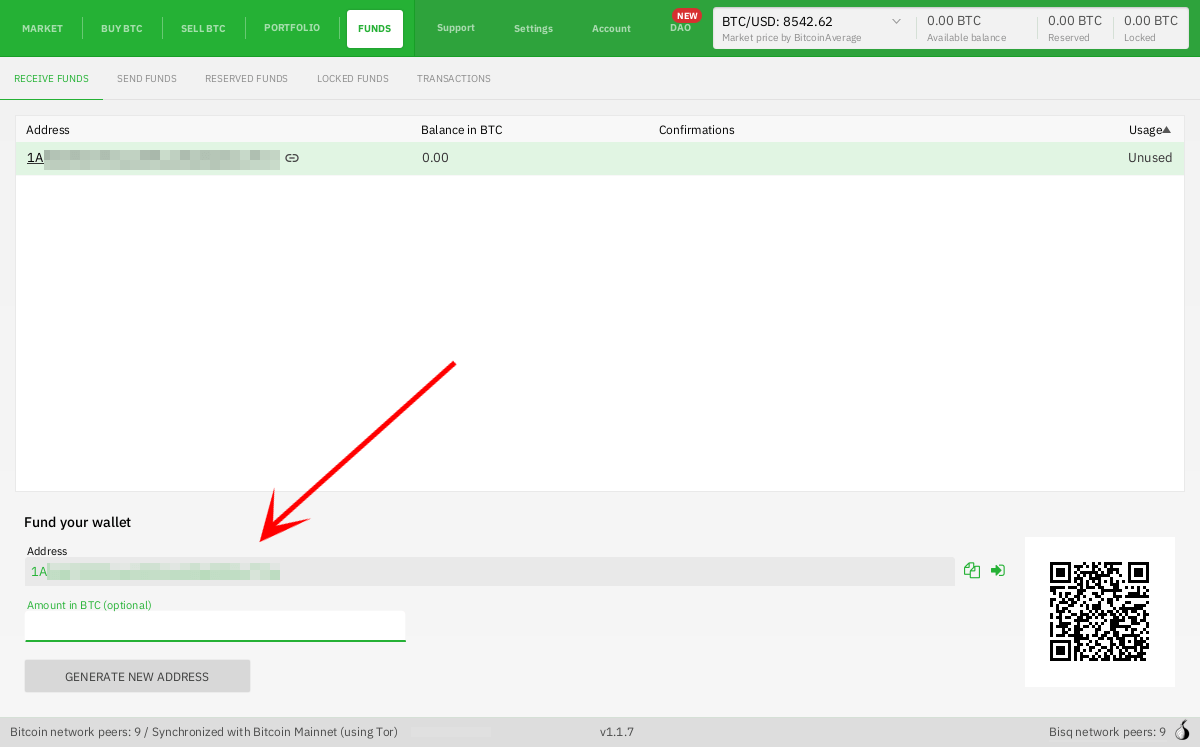
If you’d rather not hold any bitcoin in your Bisq wallet, that’s fine, but you’ll need to transfer your security deposit & fees manually when you take an offer (more on this below).
Take an offer
Now that we’ve gotten setup out of the way, let’s trade!
1. Select an offer
Back in the Buy BTC screen, click the green Take Offer button for the offer you’d like to take.
To secure the network from scammers and other bad actors, unsigned Bisq payment accounts are limited to buying 0.01 BTC until they are signed by another trusted peer.
You can have your new payment account signed by selecting an offer to buy bitcoin from a seller who’s capable of signing your account.
Just look for an offer with this check mark:
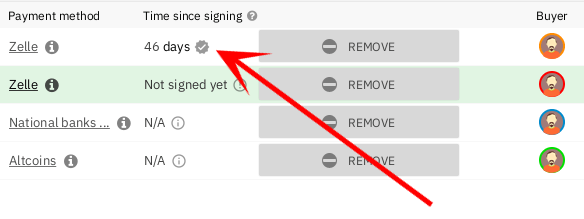
See more details in the account signing documentation.
2. Send deposit and fees to trade wallet
When taking an offer, Bisq creates a special trade wallet to hold your security deposit and fees. This wallet will be used to pay your taker fee, and will then be used to transfer your security deposit into a multisig escrow transaction together with the seller’s security deposit and the bitcoin being traded.
Once you and the seller have completed your ends of the trade, you’ll receive the bitcoin you bought along with your security deposit.
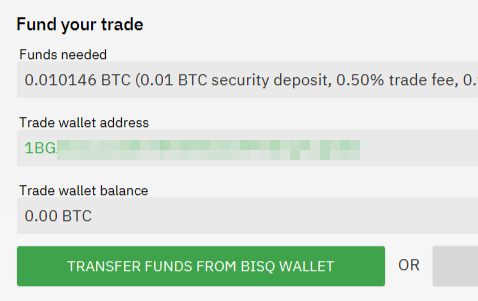
Bisq will tell you the address of the trade wallet and exactly how much to send it.
-
If you already have enough bitcoin in your Bisq wallet, click
Transfer funds from Bisq walletand the funds will automatically transfer to the trade wallet. -
If not, go ahead and send the amount required (
Funds needed) to the specified address (Trade wallet address). See Figure 2.
|
A multisig escrow transaction? How does that work?
Bisq never takes custody of users' bitcoin or national currency funds—indeed there is no way it could, because Bisq is just software, not a company. The "escrow transaction" mentioned above is a smart contract—specifically a 2-of-2 multisignature Bitcoin transaction involving you and the seller. You can read more about multisig wallets here. |
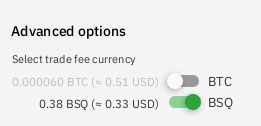
You’ll notice a toggle to pick between BTC trading fees and BSQ trading fees.
What’s this about? Is Bisq shilling its own altcoin?
Hold your horses!
BSQ is colored bitcoin that funds and governs Bisq. Remember, Bisq is a network run by software—not a company run by a CEO—but decisions still need to be made and developers still need to be paid. BSQ colored bitcoin and the Bisq DAO achieve these functions for the Bisq network without a corporate entity, legal jurisdiction, or any designated "leadership".
There was never an ICO, just extensive conception, development, and testing over 4+ years to make it a reality.
Using BSQ is optional. But buying BSQ pays Bisq’s developers and makes the project sustainable, so it’s encouraged, and this is reflected in trading fees—BSQ fees are considerably lower than BTC fees.
If you’d like to give BSQ a try, see how you can get some. For more on the Bisq DAO, see these videos or this doc.
3. Confirm trade
Once you’ve funded your trade wallet, you’ll see a Review: Take offer to buy bitcoin button appear.
Click it, and Bisq will then show you all the details of the offer you’re about to take.
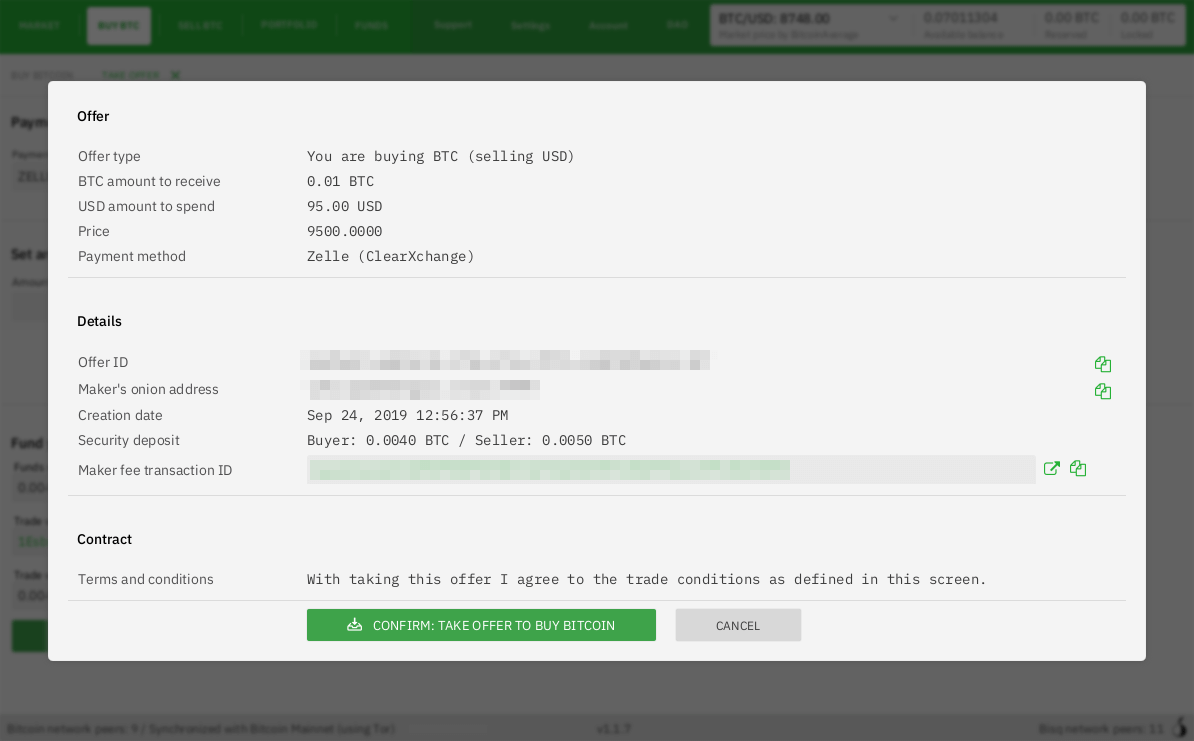
Make sure these details are correct. After you confirm these details, there’s no backing out—you must follow through (or risk losing your deposit).
If it all looks good, go ahead and hit Confirm: Take offer to buy bitcoin.
Your trade has now officially begun!
4. Send payment
Now that you’ve taken an offer, it’s almost time to pay the seller.
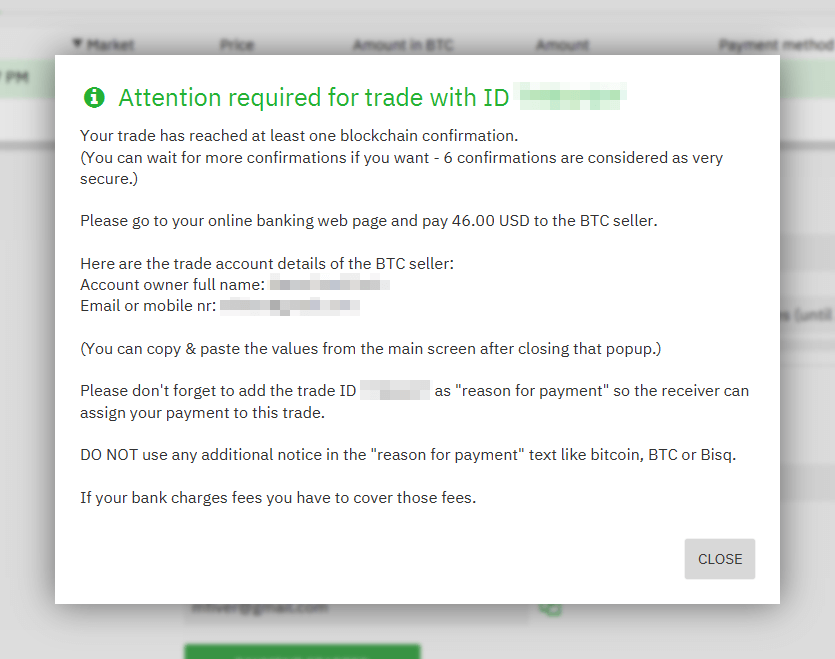
First, before showing you the seller’s payment details, Bisq will wait for the Bitcoin network to confirm the trade’s transactions. On average, this takes 10 minutes.
Then, you’ll see a pop-up with the seller’s details. Go ahead and pay the seller through the agreed payment method.
|
Confirmations?
Each confirmation makes a bitcoin transaction exponentially harder to reverse. You can wait for as many confirmations as you like before sending payment—just note the remaining time indicator. The seller must receive your payment before that timer runs out. 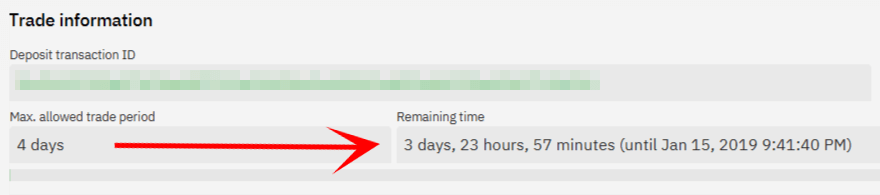
Figure 6. Make sure the seller receives your payment before this timer runs out.
Learn more about bitcoin transaction confirmations here. |
5. Mark payment as sent
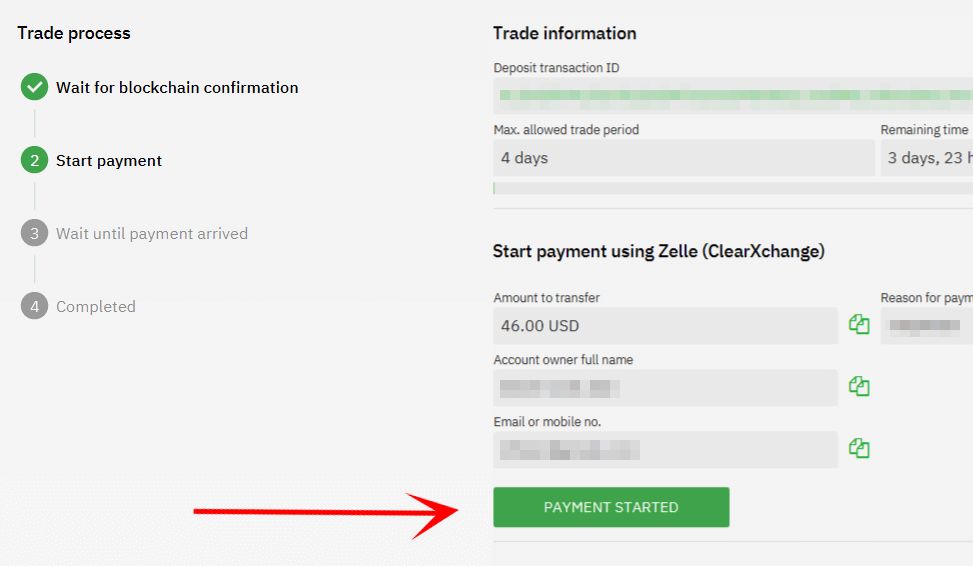
Once you’ve sent your payment, be sure to mark the payment as sent in Bisq by clicking the Payment started button.
It’s easy to forget this step, but remember: Bisq doesn’t integrate with national currency payment methods in any way—so Bisq won’t know you’ve sent your payment until you say so.
When you click Payment started, the seller will receive a notification that lets them know the payment is on the way. They’ll be on the lookout for it now.
6. Complete trade
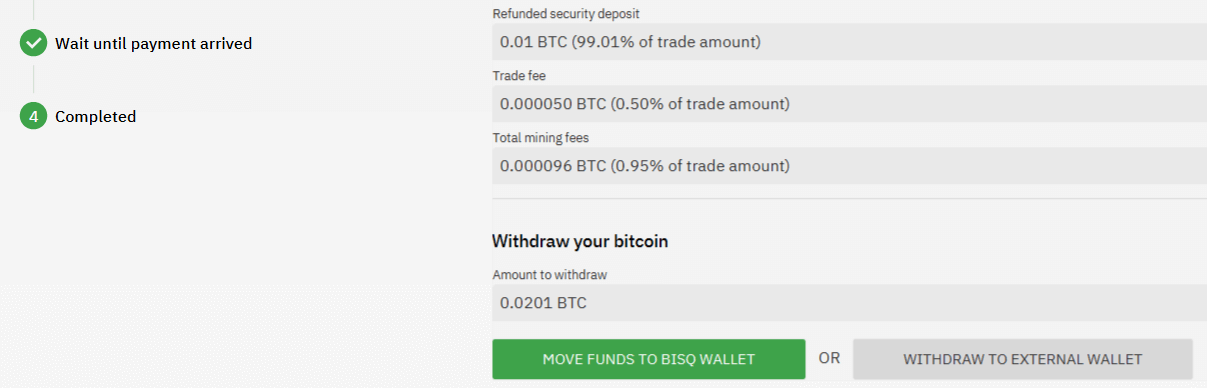
When the seller receives your payment, they’ll mark it as received in Bisq. Bisq will then complete the trade by releasing the bitcoin you bought to you along with your security deposit.
You can keep your new bitcoin in your built-in Bisq wallet by clicking Move Funds to Bisq Wallet or send it elsewhere by clicking Withdraw to External Wallet.
Congratulations. You’ve just completed your first trade on Bisq!
Next steps
Security
It’s crucial that you secure your Bisq wallet. Without a password, your wallet data is stored on your hard drive unencrypted. That’s dangerous.
Please follow our short guide here to set a password, encrypt your wallet, and securely store your wallet’s recovery seed words.
Backups
All your data is stored locally on your machine in the Bisq data directory. If something happens, no one can help you!
Therefore it’s also crucial that you back up your Bisq data directory on a regular basis. Here are details and instructions.
Mobile Notifications
There are points in the Bisq trading process when your attention is required, but what if you’re not near your computer at those times?
To solve this problem, you can get Bisq’s mobile notifications apps for iOS and Android. Once paired with your Bisq client, the app will send you a notification as soon as an offer is accepted, a payment is sent, etc.
Get help and stay in touch
If you get stuck, reach out! There’s a community of people to help you on the Bisq forum, the /r/bisq subreddit, and Keybase.
And if you really like Bisq, consider contributing! Even if you’re not a developer, there’s much you can do.
Improve this doc
Find a typo or have other suggestions for improvement? Please edit this doc or report an issue.